Showing posts with label Scalextric cars. Show all posts

Monday, 9 October 2017

Compatibility between old and new Scalextric cars and Scalextric track

Use your new Scalextric cars on your old Scalextric track and your old Scalextric cars on your new Scalextric track with these simple hints and tips

Abstract

Scalextric (in one form or other) have been producing Scalextric track and Scalextric cars since the late 1950s and over this time several different standards have been used. This is for both the cars and the track. However, some of the basic principles have remained the same. The track has a slot and two conductor rails on each side. The cars use the slot to guide them around the layout and electrical contacts to touch the conductor rails. Also, the system voltage and current requirement are similar too.
This article explains what is compatible from old to new to Digital and what is not, and what you can do about it.

Introduction

Over the years the track has a slot that has broadly remained unchanged, the cars have a pin or blade that runs in this slot to guide the car around the track. Each side of the slot there are two electrical conductor rails who's dimensions have broadly remained unchanged. The Scalextric cars then have 2 contacts, usually made from flat braided wire that touch each conductor to carry the electric current into the car. The nominal electrical voltage has remained at 12 Volts to 14 Volts for both the power systems and the motors in the cars and the current draw has remained similar too.
This article considers the compatibility of cars and track produced from 1960 to the present day including the Digital control system.

Scalextric Track

The Scalextric track pieces provide several key requirements:
  • A known surface for the cars to race on.
  • A slot in order to guide the cars around the circuit.
  • A method of supplying electrical current to the motors in the cars.
Mechanically the Scalextric track may appear quite different from old to new and had several different standards over the years. The very first track pieces produced were known as "rubber track" and wasn't well designed with poor fixings between the track pieces. In 1963 a plastic track was introduced with good positive fixings between the track pieces. This plastic track is now often referred to as the Classic Scalextric track. In 2002 the track design changed to the Scalextric Sport track design which had an improved fixing method between the track pieces. At the time of witting in 2013, this is the current track design.
Classic Scalextric track
Throughout this period the slot in the track and the conductor rails have remained largely unchanged in specification which means the key interface to the Scalextric car has also remained unchanged. One area of difference is that the Classic Scalextric track range offered many track pieces that contained obstacles such as chicanes, hay bails, backed curves and even rocks. None of these are available to the same degree with the Scalextric Sport track system.
Further, the Classic Scalextric track range had a deep graining on the surface giving the car tyres good mechanical grip for cornering and acceleration. With the introduction of Magnatraction the Sport track range didn't need such heavy graining and so has a much lighter surface graining giving a smoother appearance and feel to the track surface.
  • 1960 to 1962: Rubber track.
  • 1963 to 2001: Classic track.
  • 2002 to present: Sport track.
Classic Scalextric track and Sport Scalextric track use different clipping arrangements to connect together. There is a special piece of converter track that can be used to join together Classic Scalextric tack and Sport Scalextric track.

Scalextric Cars

The Scalextric cars have changed little in their basic layout throughout this time. There is a method at the front of the cars to locate or guide them around the track which is either in the shape of a blade or a pin. The blade guides need to rotate in the underside of the Scalextric car to allow the car to take corners while the pin guides tend to be fixed and not rotate. With pin guides the pin is narrow enough to rotate in the slot itself.
Each side of the guide blade or pin there are two metal conductors, usually in the form of flat woven metal braids. These braids rub along the conductor rails providing the necessary two electrical contacts between the track and the car. The motor is then connected to the braids with short lengths of wire. The motor drives the rear axle via a simple gear mechanism which in turn drives the car forward.
Scalextric Javelin model from 1970
Older Scalextric cars tended to have plenty of up/down movement of their front axles and sometimes the front wheels were no where near the track surface. The front of these cars rests solely on the guide and braids. Later Scalextric cars have removed this movement with most running fixed front axles where the front wheels run on the track surface. This is much more realistic as the front wheels rotate as the car moves along the track layout.
In more recent times Scalextric Digital has been introduced. In Scalextric Digital cars there is a small electric circuit (chip) fitted to the car where power from the track goes into the chip and the output from the chip drives the motor. The chip also drives an LED which points downward and which communicates to track pieces to change lanes.

Electrical

The basic electrical specification has remained unchanged from 1960 to the present. The analogue system voltage is 12 Volts to 14 Volts with a series resistive control method. The electrical current drawn by the motors has reduced over the years with the introduction of more efficient motors.
Scalextric Digital uses a completely different way to control the cars. Constant power is supplied to the whole track layout and the cars are controlled with digital signals that again go around the whole circuit.

Compatibility - old cars on new track

There are several factors concerning the use of old Scalextric cars on new Scalextric track. The first of which relates to the change in the surface grain from Classic to Sport track. The older Scalextric cars without Magnatraction will have little mechanical grip from their rear tyres making acceleration and in particular cornering difficult. This can be overcome by fitting Magnatraction magnets and/or MAX Grip tyres. With some ingenuity magnets can be fitted to all of the older Scalextric cars and MAX Grip tyres are available for all the older Scalextric cars too.
The other difficulty concerns the pin guides. The later track layouts used obstacles such as crossovers and the modern Scalextric Digital layouts use lane change pieces or points in the railway vernacular. Essentially, the pin guide doesn't provide any directional stability which means as a car with a pin guide passes over a crossover piece of track it stands a good chance of moving to the wrong lane or slot. To use Scalextric cars with pin guides on later layouts either the lane change or crossover pieces of track need to be removed from the layout or the cars can be converted to use guide blades instead of pins.
The older Scalextric motors tend to consume more electrical current than the newer Scalextric cars. As such the newer power supplies associated with newer Scalextric layouts may not provide sufficient current to allow two older Scalextric cars to race at full power.
Non digital Scalextric cars cannot be used on the Scalextric Digital system as the electrical systems are not compatible. NOTE, a traditional analogue Scalextric car may sustain permanent damage if placed onto a live Scalextric Sport track layout.

Compatibility - new cars on old track

On the whole it is easier to operate new Scalextric cars on the older Scalextric track layouts. Electrically they consume less current and all have guides blades rather than pins. The key problem concerns the fixed front axle as this prevents many of the older obstacles from being used. As the front wheels traverse an obstacle they lift the contact braids away from the conductor rails on the track and the car stops. Obstacles that cannot be used with new Scalextric cars include:
  • Banked curves.
  • Hump backed bridges.
  • Bumpy or rocky track.
Additionally, because of the front axle the new Scalextric cars need a very flat surface on which to operate. Old warped, bent or out of shape track pieces may cause problems for the newer Scalextric cars.
Scalextric cars fitted with a Scalextric Digital chip can be used on analogue layouts.

Compatibility - Analogue and Digital

There are two types of control mechanisms used by Scalextric, these are Analogue and Digital. The Analogue control system is the traditional method which uses a basic resistive winding of wire in the hand controller to control the D.C. voltage sent to the track and car. In the car the wires from the braids connect directly to the D.C. motor.
The Digital system uses frequent digital data messages from the controller to a microprocessor fitted to the car. The track has a permanent A.C. power supply which also goes to the microprocessor in the car. The microprocessor in the car then controls a Pulse Width Modulated (PWM) power feed to the D.C. motor based on the digital data messages from the controller. Therefore there is no direct connection from the track to the motor in a digital car.
Digital cars will work perfectly normally on an analogue power system but analogue cars do not work the Digital power system. Analogue cars may be permanently damaged by the Digital power system.

General

On the whole there is very good compatibility between the old and new Scalextric cars and Scalextric track. Newer Scalextric cars can run well on older Scalextric layouts as long as the layout is flat and contains no sudden changes in height such as rocks or banked curves. Older cars may need some updates to run well on the newer track especially concerning grip. Scalextric cars with pin guides need to avoid layouts with any form of crossover or lane change method.

About the author:

Gary Harding has been working with Scalextric cars for over 40 years and now operates Scalextric Car Restorations in the UK. Scalextric Car Restorations is a Worldwide internet based business that offers for sale high quality Scalextric cars and Scalextric parts from the 1960s to the present day. All the restoration work is carried out to the highest standards with the highest quality parts available. Only the best cars are selected and the final result is a car that is genuinely like new.
Further help and advice relating to this article or Scalextric cars in general can be found at:

Monday, 29 February 2016

Rear wing for vintage Scalextric Electra Javelin and Powersledge cars

This rear wing is a direct replacement for the vintage Scalextric cars listed below.

http://www.scalextric-car.co.uk/Parts/Wings_and_Spoilers/Wing_Rear_C3_C4_C5_C6_C8_C9_C10_C11_C13_C23_C24/Wing_Rear_C3_C4_C5_C6_C8_C9_C10_C11_C13_C23_C24.htm

http://www.scalextric-car.co.uk/Parts/Wings_and_Spoilers/Wing_Rear_C3_C4_C5_C6_C8_C9_C10_C11_C13_C23_C24/Wing_Rear_C3_C4_C5_C6_C8_C9_C10_C11_C13_C23_C24.htm


Ref.
Description
Colour
C3 Javelin Special
White
C4 Electra Special
White
C5 Europa Vee
White
C6 Panther
White
C8 Lotus Indianapolis
White
C9 Ferrari V8
White
C10 Super Javelin Race Tuned
White
C11 Super Electra Race Tuned
White
C13 Tiger Special Sports
Black
C23 Scalletti Arrow
White
C24 Team Car MkII
White


 Another great product from Scalextric Car Restorations


Friday, 12 February 2016

How best to resurrect your old Scalextric set

Abstract

Frequently the older Scalextric sets are rescued from long term storage. This article shows that in six simple steps a typical Scalextric set can be brought back to life and enjoyed once more.

Introduction

Scalextric sets produced from 1960 through to around 1990 can be temperamental at times. This is particularly noticeable when the Scalextric set has been in long term storage. Numerous fault can occur even when the set is not in use as well as faults induced by the storage conditions. Damp and high humidity can cause corrosion and mould growth, dust can coat everything and materials can age, for example the shrinkage of plastics over time.
This article lists six simple steps that when followed will ensure an old Scalextric set can be brought back to life and offer great enjoinment more. The six steps are:
  • Completeness of the set
  • Inspecting for damaged parts
  • Resurrecting the track
  • Checking the power supply and controllers
  • Resurrecting the cars
  • Upgrading the cars

Part 1 - Completeness of the set

Any Scalextric set or layout needs to have all the necessary parts in order to operate properly. In this first section we'll consider the completeness of your old set and generate a list of items you'll need to source to get your set up and running again.
If you have an original boxed set then the contents will be listed in the relevant Scalextric catalogue or in the instruction sheet that came with the set. If your Scalextric set is one with many added accessories, cars and other parts then it's a case of checking against the generic list given below.
  • Power supply
  • Hand controllers - at least 2 off
  • Track - a good range of straights and corners
  • Barriers
  • Track support pieces for bridges and banked corners
  • Cars - at least 2 off
If any of the above are missing then sourcing suitable parts will be necessary. Make a list at this stage as other parts may be needed later, just because something is present doesn't necessarily mean it will work.
With the track you should ensure that paired or matching track pieces are present in the correct quantities, for example if you have a long chicane then you'll need both an "in piece" and an "out piece". Also if you have a cross over you'll need to ensure you have two of these, that is if you want to race 2 cars. Match these track pieces and keep them together for now.
Every item should be checked briefly for any obvious damage or missing parts, for example hand controllers with no attached wires. Items found to be unusable should be put to one side and added to the list of parts required.
At the end of this section of resurrecting your old Scalextric set you'll have two piles of parts, one where the parts look OK to be used and one where the parts cannot be used. You'll also have a list of missing parts and damaged pieces that you need to source.
You can, of course, start sourcing the missing and damaged pieces of your set immediately or wait until after part 2 where we'll inspect all the parts for damage and draw up a complete list of what's needed.

Part 2 - Inspecting for damaged parts

Part 2 of this guide on resurrecting an old Scalextric set takes a closer look at the quality of the items you have in your set. In part 1 you may have discarded some components as clearly damaged and in this part we'll examine the remaining pieces in a little more detail to identify any parts that are also damaged.
Let's start with the power supply and controllers. Check the power supply for any visual defects, missing or incorrect mains plug top, exposed mains wires, damaged mains wire insulation. If there are any doubts about the mains side of the power supply then consult a qualified electrician. On the low voltage side of the power supply (transformer) check that the connection studs and thumbscrews are present and undamaged. If all looks good then the power supply can be testing by connecting a 21W car bulb to the output of the power supply. The bulb should illuminate brightly and consistently.
For the hand controllers, visually inspect each controller housing and ensure the operating lever moves through its full displacement smoothly and returns to the fully off position. Inspect the wires for damaged insulation and confirm the connection plugs and eyelets are present and undamaged. Connect the hand throttles to the known good power supply and the output of the controllers to a 5W car bulb. The bulb should not illuminate with the hand controller in the off position. Slowly operate the hand controller and the bulb should illuminate ever more brightly until full throttle is achieved.
With the power supply and controllers working correctly it's time to inspect the track pieces. Firstly check that the plastic connection lugs are all present and correct, then check for visible corrosion on the steel track rails (orange / brown rust marks). Light corrosion can be removed with a track polishing pad but deep pitting will be difficult to remove and a replacement tack piece will be needed. Check that the conductor rails wrap around the plastic end lugs such that each track piece electrically connects to the next, then check the flatness of the track. Many older track pieces tend to bow in the middle giving very a uneven running surface.
Some of the specialised track pieces, e.g. crossovers, have small wires underneath to electrically connect the track rails together. Visually check these are present and are making good connections.
Finally, your Scalextric cars. Inspect the cars for any obvious missing or damaged parts Obvious faults to look for are:
If the car looks complete then the first test is to turn the driven wheels by hand. The wheels should turn the axle and the motor armature. Feel for freedom of movement and for binding of the drive system. Any binding, however slight, should be investigated.
The easiest way to check the functionally of a car is to connect together the power supply, one hand controller and one piece of track. Place the car on the track and with one hand lift the driven wheels off the track surface slightly. Then apply a very small amount of power with the hand controller. The motor should hum slightly and the driven wheels should turn slowly. With some of the older cars the motor will hum but the wheels may not turn, this is normal.
Then apply around one third throttle and the motor pitch should increase and the wheels turn faster. If the wheels do not turn then stop this test as there is a fault which will need to be investigated. Listen for a repeating clicking sound from the car. If this is heard then stop the test as there may be a fault with the drive gears. Further investigation will be required.
With the driven wheels turning freely on one third throttle the next step is confirm the condition of the electrical connections. Still at one third throttle, pivot the car around the guide pivot slowly in one direction until the end stop is reached, now back in the other direction until the other end stop is reached. If the motor hesitates during the test then the wiring and connections will need further investigation.
These checks and tests will give you a good indication of what parts of your Scalextric set are damaged and need to be replaced or repaired.

Part 3 Resurrecting your track

Now that all the damaged parts of your old Scalextric set are identified it's time to start to get things into working condition. In part 3 of this guide we'll look at your track and get it into full working order. There are a couple of common problems with old Scalextric track:
  • Dull and rough metal track rails
  • Bow in the track surface along the track piece length
  • Narrowing of the slot between the track rails
  • Dirty and dusty track surface
Let's start with the dirty and dusty track surface. Just like a real race track, the surface of your Scalextric track is vital for grip and the performance of your cars. Track that has been stored well may need nothing more than a wipe over with a damp cloth. However, very dusty track may need a good scrub with an old nail brush in warm soapy water. We recommend adding washing-up liquid as this will also remove any oil and grease deposits. Dry the track quickly to prevent any further corrosion of the track rails.
With the track clean the next step is to flatten out any bowing or kinks in the running surface. This is accomplished by gently bending the track back to a flat level surface. While doing this you may find that the track rails buckle into the slot, blocking the slot. This is normal and should not be considered a problem at this stage. The important point is to get the track as flat and level as you can.
Now that the track pieces are all clean and flat we can take a look at the slot between the track rails. Some track pieces may have a narrowing of the slot especially towards the ends of the track piece. This is usually caused by the steel rails not being crimped well to the plastic track moulding. Tightening of the crimping will resolve this. Then, you may find that the slot narrows at the very end of the track piece where the next track piece will electrically connect. This is resolved by pushing the track back into shape with a flat blade screwdriver. The same technique is used for any localised bucking along the slot length, simply push the buckle out of the way to open up the slot.
Finally the running surface of the track rails need to be polished back to bright, shiny metal. This will give better electrical connection to the car giving higher speeds and better acceleration. Also, there will be less rolling resistance to the car and far less ware on your pick-up braids. The track polishing pad is ideal for this task bringing your track rails back to shiny metal easily. Even light corrosion can be removed but deep pitting will be difficult to remove.
By now your track will be ready for use with a good, clean track surface and bright shiny, smooth track rails. Time to design your layout ...

Part 4 Checking the power supply and controllers

Part 4 of this guide on resurrecting your old Scalextric set takes a closer look at the power supply and controllers you have in your set. In part 2 you may have discarded some of the power supply and controller components as clearly damaged and in this part we'll examine the remaining pieces in a little more detail to identify any parts that are also damaged or not functioning correctly.
Let's start with the power supply. Check the power supply for any visual defects, missing or incorrect mains plug top, exposed mains wires, damaged mains wire insulation. If there are any doubts about the mains side of the power supply then consult a qualified electrician. On the low voltage side of the power supply (transformer) check that the connection studs and thumbscrews are present and undamaged. If all looks good then the power supply can be testing by connecting a 21W car bulb to the output of the power supply. The bulb should illuminate brightly and consistently.
The power supply should emit a quiet humming sound and if this sound is louder than expected then the transformer itself inside the power supply is at fault. If the humming sound is excessive then the whole power supply may need to be replaced. Repairing or replacing the transformer can be carried out by a fully qualified electrician.
Some of the earlier power supplies are also fitted with a manual reset button which switches off the output of the power supply if there is a short circuit in the output or if too much current is drawn. This can be checked by deliberately connecting together the output terminals for a short duration. The output protection device should then disable the output of the power supply. The reset button can then be pressed to re-energise the output of the power supply. Later power supplies also have this protection device which automatically resets itself after a few seconds.
Various replacement powers supplies are available if needed.
For the hand controllers, visually inspect each controller housing and ensure the operating lever moves through its full displacement smoothly and returns to the fully off position. To do this operate the trigger slowly to the full power position and then release it very slowly until at the fully off position.
Inspect the wires for damaged insulation and confirm the connection plugs and eyelets are present and undamaged. Connect the hand throttles to the known good power supply and the output of the controllers to a 5W car bulb. The bulb should not illuminate with the hand controller in the off position. Slowly operate the hand controller and the bulb should illuminate ever more brightly until full throttle is achieved.
Replacement hand controllers are available if needed.

Part 5 Resurrecting the cars

Part 5 of this guide on resurrecting your old Scalextric set takes a closer look at resurrecting your old Scalextric cars. In part 2 you should have inspected your cars for any obvious missing or damaged parts. The obvious faults to look for are:
If you haven't carried the inspection of your cars as covered in part 2 of this guide then you should do so now before preceding with the process below.
  1. Carefully take your car apart to the major components. Some Scalextric cars are held together with screws, some with sliding clips and some where the chassis clips into the body.
    Note: Some cars are difficult to unclip the body from the chassis, if in doubt then contact us for further information.
  2. All the plastic parts (body, window moulding, chassis, driver plate, wheels etc.) can then be cleaned in warm soapy water. Use a nail brush or similar to remove all the dust and dirt. This will most likely also remove any water slide decals that have been added to the car. The plastic mouldings may have become brittle with age so support them while applying pressure with the nailbrush. Once the plastic parts are clean rinse them off with fresh water and dry thoroughly. Some of the cars from the 1960s tend to have a white powdery mould growing on them. This can be removed through repeating this cleaning process until all the mould has gone.
  3. Once clean and dry inspect the plastic parts for for any damage. Parts not suitable should be discarded and replacements sourced.
  4. The motor should have a small drop of lubricating oil on each bearing and then be tested at full speed for a short period of time and at race temperature to test the bearings, the armature windings and the motor brushes. If the motor fails any of these tests then replace it as it would be of little use under race conditions. The open frame RX and Formula Junior motors can sometimes be repaired, see our article "How to service the RX motor in your Scalextric car" to find out more.
  5. The wiring to the motor should be checked and repaired as necessary. If you are in any doubt about the condition of the wiring then replace it as a damaged conductor can be hard to find and can ruin a good car.
  6. The white plastic motor pinion gear fitted to cars from the late 1970 through to the late 1990s can crack and become loose on the motor shaft. Check for this and replace the motor pinion gear if you are unsure.
  7. Check the condition of any other electrical items fitted to your car, usually lights. On some cars the lighting circuits are polarity sensitive as they are fitted with LEDs which are polarity sensitive. Replace blown or damaged bulbs.
  8. Reassemble the bearings, spacers and wheels onto the axles. If the wheels are loose on the axles then a small drop of super glue will keep them in place.
  9. Refit the axles to the chassis. They should be a secure fit and rotate freely.
    Note: For the rear axle the large flat disc of the contrate gear should be on the RIGHT of CENTRE as viewed from the UNDERSIDE of the car. If the rear axle is fitted the wrong way round the car will go backwards.
  10. Refit the motor and all the other electrical items to the chassis / body of the car. Use new pick-up braids and new pick-up pins (if pins are used on your car). The old pins, especially if crimped to the wires can be a common cause of open circuit wires. There are 2 sizes of pick-up pins are available, 1.75mm and 1.95 mm, if you are not sure which you need then contact us.
  11. Fit new tyres to the rear (driven) wheels unless your original tyres are in very good and grippy condition. Front (non-driven) wheels can take visually good used tyres. Give all the bearings and gears a drop of oil to enhance performance and prolong their life. Check the gears for smooth and free operation. If you feel any resistance then contact us for further information.
  12. If all is well then put the chassis on the track and ensure the car is OK electrically and goes in the right direction. If the car goes in the wrong direction then swap over the wires at either the guide OR the motor.
  13. Refit all the parts back into the body, windows, driver plate etc.
  14. The assembled upper body can now be re-fitted to the completed chassis. Carry out the tests from part 2 of this guide once more to confirm the car is functioning as well as can be expected. Run the car on the track confirm the tyre grip.
  15. Finally, the ancillary or decorative parts can be fitted, e.g. bumpers, wing mirrors , spoilers etc. and decals.
With the cars, track, power supply and controllers all working correctly it's time to race and have some fun.

Part 6 Upgrading the cars

Part 6 of this guide on resurrecting your old Scalextric set takes a closer look at upgrading your old Scalextric cars. In part 5 you should have restored the cars so that they run like they did when they were new. Unfortunately that means they are no match for the modern range of Scalextric cars and suffer all their original handling and performance problems.
Upgrades to a Scalextric car essentially fall into one of two categories, those that are totally reversible and those that are not totally reversible. The upgrades that are totally reversible are the best to start with as you can undo the upgrades and get your original car back. These upgrades are:
  1. Just as with a full size car, a Scalextric car relies on its tyres (rear tyres) for traction, braking and cornering. Simply put, the better the grip of the tyre the better the performance of the Scalextric car. For many Scalextric cars there are higher performance tyres available. The very best results are obtained with our max grip series of tyres.
  2. The next step is to increase the power of the motor. If your car has an RX open frame motor then use an adaptor kit and fit a Johnson motor. If your car has a Johnson motor then again use an adaptor kit and fit a Mabuchi motor. If you already have a Mabuchi motor fitted then consider one of the latest and more powerful versions of the Mabuchi motor. If you are not sure which motor you have then use our free Library of motors to identify your motor.
  3. Adding weight to your Scalextric car can make it more stable in the corners and accelerate more quickly. Weight over the rear driving wheels will reduce wheel spin by increasing the friction between the tyres and the track. For the Engineers this is simply a case of F=µN. Adding weight increases N and therefore proportionally increases F, the friction. Use Bluetac and steel ball bearings to put the weight where you need it.
  4. The Scalextric cars from the 1970s and 1980 had a tendency to tip over in corners due to a floating front axles. This effect can be reduced by replacing the current axles with wider ones which increases the stability of the car in corners allowing corners to be taken at higher speeds.
The upgrades above can be carried out to most older Scalextric cars and can be adjusted and removed as necessary. The upgrades that are NOT reversible are the next to try. Which, if any, of these you try will result in permanent alterations to your car which may affect its value. If you are unsure DO NOT proceed with these upgrades:
  1. Adding a magnet to your Scalextric car will give an instant performance increase if fitted in the right location. Remember that the magnet will also give the car an increase in rolling resistance and so can be overdone. Use magnets only with Mabuchi motors for best effect. The best place to fit a magnet is just in front of the rear axle between the rear axle and the motor. This will give the best grip for the rear tyres.
  2. By lowering the guide the centre of gravity of the car is lowered too. This will give your car more stability in the corners. Note that it is not possible to lower the guide on all Scalextric cars.
  3. With most of the older Scalextric cars the front axle is allowed to move up and down. This allows the car to traverse the banked corners and obstacles in the track. If your track is mostly flat then the front axle can be fixed in location giving a great increase in cornering stability. The front wheels should be placed so that they just touch the track with the weight of the front of the car still on the guide blade.
There are, of course, many other upgrades you can make to your Scalextric car to improve its track performance. The points listed here are the more common ones and the ones that can make a big difference to the car with the least amount of effort. For other ideas and some test results have a look at what happened as we upgraded an old Scalextric C52 Ford Escort RS1600.
This concludes our series on how best to resurrect your old Scalextric set. We hope you've enjoyed this series of articles and found them helpful. If you have any feedback please let us know.

About the author

Gary Harding has been working with Scalextric cars for over 30 years and now operates Scalextric Car Restorations in the UK. Scalextric Car Restorations is a Worldwide internet based business that offers for sale high quality Scalextric cars and Scalextric spares and parts from the 1960s to the present day. All the restoration work is carried out to the highest standards with the highest quality parts available. Only the best cars are selected and the final result is a car that is genuinely like new.
Further help and advice relating to this article or Scalextric cars in general can be found at:
http://www.scalextric-car.co.uk

Thursday, 11 February 2016

Compatibility between old and new Scalextric cars and Scalextric track – updated

Use your new Scalextric cars on your old Scalextric track and your old Scalextric cars on your new Scalextric track with these simple hints and tips

Abstract

Scalextric (in one form or other) have been producing Scalextric track and Scalextric cars since the late 1950s and over this time several different standards have been used. This is for both the cars and the track. However, some of the basic principles have remained the same. The track has a slot and two conductor rails on each side. The cars use the slot to guide them around the layout and electrical contacts to touch the conductor rails. Finally the system voltage and current requirement are similar too.
This article explains what is compatible from old to new and what is not, and what you can do about it.

Introduction

Over the years the track has a slot that has broadly remained unchanged, the cars have a pin or blade that runs in this slot to guide the car around the track. Each side of the slot there are two electrical conductor rails who’s dimensions have broadly remained unchanged. The Scalextric cars then have 2 contacts, usually made from flat braided wire that touch each conductor to carry the electric current into the car. The nominal electrical voltage has remained at 12 Volts to 14 Volts for both the power systems and the motors in the cars and the current draw has remained similar too.
This article considers the compatibility of cars and track produced from 1960 to the present day (2013).

Scalextric Track

The Scalextric track pieces provide several key requirements:
  • A known surface for the cars to race on.
  • A slot in order to guide the cars around the circuit.
  • A method of supplying electrical current to the motors in the cars.
Mechanically the Scalextric track may appear quite different from old to new and had several different standards over the years. The very first track pieces produced were known as “rubber track” and wasn’t well designed with poor fixings between the track pieces. In 1963 a plastic track was introduced with good positive fixings between the track pieces. This plastic track is now often referred to as the Classic Scalextric track. In 2002 the track design changed to the Scalextric Sport track design which had an improved fixing method between the track pieces. At the time of witting in 2013, this is the current track design.
Classic Scalextric track
Throughout this period the slot in the track and the conductor rails have remained largely unchanged in specification which means the key interface to the Scalextric car has also remained unchanged. One area of difference is that the Classic Scalextric track range offered many track pieces that contained obstacles such as chicanes, hay bails, backed curves and even rocks. None of these are available to the same degree with the Scalextric Sport track system.
Further, the Classic Scalextric track range had a deep graining on the surface giving the car tyres good mechanical grip for cornering and acceleration. With the introduction of Magnatraction the Sport track range didn’t need such heavy graining and so has a much lighter surface graining giving a smoother appearance and feel to the track surface.
  • 1960 to 1962: Rubber track.
  • 1963 to 2001: Classic track.
  • 2002 to present: Sport track.
Classic Scalextric track and Sport Scalextric track use different clipping arrangements to connect together. There is a special piece of converter track that can be used to join together Classic Scalextric tack and Sport Scalextric track.

Scalextric Cars

The Scalextric cars have changed little in their basic layout throughout this time. There is a method at the front of the cars to locate or guide them around the track which is either in the shape of a blade or a pin. The blade guides need to rotate in the underside of the Scalextric car to allow the car to take corners while the pin guides tend to be fixed and not rotate. With pin guides the pin is narrow enough to rotate in the slot itself.
Each side of the guide blade or pin there are two metal conductors, usually in the form of flat woven metal braids. These braids rub along the conductor rails providing the necessary two electrical contacts between the track and the car. The motor is then connected to the braids with short lengths of wire. The motor drives the rear axle via a simple gear mechanism which in turn drives the car forward.
Scalextric Javelin model from 1970
Older Scalextric cars tended to have plenty of up/down movement of their front axles and sometimes the front wheels were no where near the track surface. The front of these cars rests solely on the guide and braids. Later Scalextric cars have removed this movement with most running fixed front axles where the front wheels run on the track surface. This is much more realistic as the front wheels rotate as the car moves along the track layout.
In more recent times Scalextric Digital has been introduced. In Scalextric Digital cars there is a small electric circuit (chip) fitted to the car where power from the track goes into the chip and the output from the chip drives the motor. The chip also drives an LED which points downward and which communicates to track pieces to change lanes.

Electrical

The basic electrical specification has remained unchanged from 1960 to the present. The analogue system voltage is 12 Volts to 14 Volts with a series resistive control method. The electrical current drawn by the motors has reduced over the years with the introduction of more efficient motors.
Scalextric Digital uses a completely different way to control the cars. Constant power is supplied to the whole track layout and the cars are controlled with digital signals that again go around the whole circuit.

Compatibility – old cars on new track

There are several factors concerning the use of old Scalextric cars on new Scalextric track. The first of which relates to the change in the surface grain from Classic to Sport track. The older Scalextric cars without Magnatraction will have little mechanical grip from their rear tyres making acceleration and in particular cornering difficult. This can be overcome by fitting Magnatraction magnets and/or MAX Grip tyres. With some ingenuity magnets can be fitted to all of the older Scalextric cars and MAX Grip tyres are available for all the older Scalextric cars too.
The other difficulty concerns the pin guides. The later track layouts used obstacles such as crossovers and the modern Scalextric Digital layouts use lane change pieces or points in the railway vernacular. Essentially, the pin guide doesn’t provide any directional stability which means as a car with a pin guide passes over a crossover piece of track it stands a good chance of moving to the wrong lane or slot. To use Scalextric cars with pin guides on later layouts either the lane change or crossover pieces of track need to be removed from the layout or the cars can be converted to use guide blades instead of pins.
The older Scalextric motors tend to consume more electrical current than the newer Scalextric cars. As such the newer power supplies associated with newer Scalextric layouts may not provide sufficient current to allow two older Scalextric cars to race at full power.
Non digital Scalextric cars cannot be used on the Scalextric Digital system as the electrical systems are not compatible. NOTE, a traditional analogue Scalextric car may sustain permanent damage if placed onto a live Scalextric Sport track layout.

Compatibility – new cars on old track

On the whole it is easier to operate new Scalextric cars on the older Scalextric track layouts. Electrically they consume less current and all have guides blades rather than pins. The key problem concerns the fixed front axle as this prevents many of the older obstacles from being used. As the front wheels traverse an obstacle they lift the contact braids away from the conductor rails on the track and the car stops. Obstacles that cannot be used with new Scalextric cars include:
  • Banked curves.
  • Hump backed bridges.
  • Bumpy or rocky track.
Additionally, because of the front axle the new Scalextric cars need a very flat surface on which to operate. Old warped, bent or out of shape track pieces may cause problems for the newer Scalextric cars.
Scalextric cars fitted with a Scalextric Digital chip can be used on analogue layouts.

Compatibility – Analogue and Digital

There are two types of control mechanisms used by Scalextric, these are Analogue and Digital. The Analogue control system is the traditional method which uses a basic resistive winding of wire in the hand controller to control the D.C. voltage sent to the track and car. In the car the wires from the braids connect directly to the D.C. motor.
The Digital system uses frequent digital data messages from the controller to a microprocessor fitted to the car. The track has a permanent A.C. power supply which also goes to the microprocessor in the car. The microprocessor in the car then controls a Pulse Width Modulated (PWM) power feed to the motor based on the digital data messages from the controller. Therefore there is no direct connection from the track to the motor in a digital car.
Digital cars will work perfectly normally on an analogue power system but analogue cars do not work the Digital power system. Analogue cars may be permanently damaged by the Digital power system.

General

On the whole there is very good compatibility between the old and new Scalextric cars and Scalextric track. Newer Scalextric cars can run well on older Scalextric layouts as long as the layout is flat and contains no sudden changes in height such as rocks or banked curves. Older cars may need some updates to run well on the newer track especially concerning grip. Scalextric cars with pin guides need to avoid layouts with any form of crossover or lane change method.

About the author:

Gary Harding has been working with Scalextric cars for over 35 years and now operates Scalextric Car Restorations in the UK. Scalextric Car Restorations is a Worldwide internet based business that offers for sale high quality Scalextric cars and Scalextric parts from the 1960s to the present day. All the restoration work is carried out to the highest standards with the highest quality parts available. Only the best cars are selected and the final result is a car that is genuinely like new.
Further help and advice relating to this article or Scalextric cars in general can be found at:
http://www.scalextric-car.co.uk

Tuesday, 9 February 2016

Scalextric motor Brush holder kit for the vintage RX motor

New replacement motor brush holder kit suitable for the vintage Scalextric RX motors.  This new Scalextric motor brush holder kit can be used on all the Scalextric RX motors used in vintage Scalextric cars including the ‘Race Tuned’ versions. The brush holder comes complete with the fixing rivet.
Scalextric motor brush holder
The picture above shows the brush holder kit fitted to the Scalextric RX motor.
Fitting instruction:
  • Remove the RX motor from the Scalextric car.
  • Remove the brushes, brush spring and wiring from the Scalextric RX motor.
  • Use a permanent marker to mark the magnet to ensure it is refitted in the correct orientation.
  • Remove the magnet from the motor.
  • Remove the motor top plate.
  • Drill out the existing brass rivet holding the old brush holder in place.
  • Clean and inspect the motor top plate for damage.
  • Push the rivet through the brush holder and the motor top plate. Rivet head to be on the outside of the motor.
  • Use a small hammer or press tool to compress and tighten the rivet.
  • Refit the motor top plate.
  • Refit the magnet noting the correct orientation.
  • Refit the motor brushes and spring.
  • Refit the motor to the Scalextric car.
Another great Scalextric spare part from Scalextric Car Rerstorations

Monday, 1 February 2016

7 ways to get more tyre grip from your Scalextric tyres

Improve the racing performance of your Scalextric car with these simple hints and tips.
In order for your Scalextric car to give the best lap times under race conditions the track and car must both be in the best of condition. This list below will cure most Scalextric car grip problems.
Scalextric tires
1. Clean your track
Very often there is a thin layer of dust on Scalextric track. This dust acts as a barrier between the rubber of the tyre and the plastic surface of the track. Before use, clean away this dust with a damp cloth. The track must be dried immediately to prevent corrosion setting in.
2. Clean your tyres
This dust and other debris can build up on your Scalextric car tyres too. This can also be cleaned off with a damp cloth.
3. Remove the oxides
Over time the rubber surface of your tyres can oxidise forming a thin hard, non grippy layer. If thin enough this layer can be sanded off with around 100 grit sand paper or the modern equivalents. This will bring fresh rubber into play and can give great improvements in grip levels.
4. Replace your tyres
If the tyre is deeply oxidised or cracked then replacement tyres is the only answer. Replacement tyres are available for just about all the Scalextric cars ever made – even the really old ones.
5. Use better tyres
To give an even better improvement in grip over a good original Scalextric tyre then use MAX Grip tyres. Manufactured from 29 Shore A hardness rubber, grip doesn’t get much better than this.
6. Add some weight
As friction is proportional to the downward force acting on the rear tyres of a Scalextric car then adding weight over the rear tyres will improve grip. Adding weight is, however, a balancing act as the weight will need to be accelerated, braked, and go around corners. This is a great way to fine tune the grip level wanted.
7. Use a magnet
Finally the way that Scalextric have used for years. Adding a magnet near to the rear axle adds downward force with little weight, especially the powerful Neodymium magnets. The magnet is attracted to the steel rails of the track giving the downward force. Again, this solution can be tuned by placing the magnet nearer or further away from the track rails.
There are many other possible solutions that can be used but these are the main solutions used. This is intended as a simple guide only. If the information above does not give you the grip you want then contact us for further information.
Another great Scalextric tip from Scalextric Car Restorations

Rear wing for classic Scalextric C46 Porsche 917

Announcing the remanufactured replacement plastic moulded rear wing set for the classic C46 Porsche 917 car.
Rear wing set for Scalextric C46 Porsche 917
Scalextric rear wing set plastic moulded and painted silver for the classic Scalextric classic C46 Porsche 917 car.
Another great product from Scalextric Car Restorations.

Remanufactured – the rear axle trailing arm for classic Scalextric March Ford 771

These rear axle trailing arms were used on the March Ford 771 2 wheeler classic Scalextric cars.
Trailing arm for classic Scalextric March Ford 771
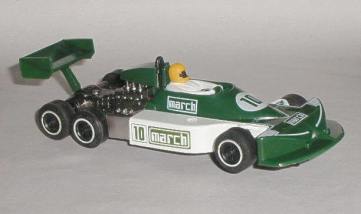
Scalextric March Ford 771
These Scalextric rear axle trailing arms are used on the classic Scalextric March Ford 771 cars to secure the 3rd axle to the 2nd axle. They are remanufactured in plastic. The number C129-*060 is moulded onto this part.
Another great Scalextric part from Scalextric Car Restorations

Sunday, 31 January 2016

Guide blade upgrade kit for vintage Scalextric C74 and C75

Guide blade Scalextric C74 and C75

This guide blade upgrade kit is a direct replacement for the original Scalextric G5 guide pin fitted to the cars listed below. The kit comes complete with:
  • Guide blade G30
  • Braids (fitted)
  • Braid pins (fitted)
  • Wires (fitted)
  • Motor electrical tags (fitted)
  • Guide adaptor bracket
The original guide pin fitted to these Scalextric cars cannot readily be used on modern track with crossovers, points etc. as the pin is small and the car can change lanes when traversing a crossover! This kit uses a later Scalextric guide blade which is needed to maintain the right direction of travel on modern track obstacles.
No soldering is required as this kit simply fits into place with only basic tools. The original car body and motor are used with no changes at all, which means the original guide pin can be refitted at any time to return your Scalextric car to it’s original condition.
With this kit you can enjoy your original Scalextric Austin Healey 3000 and Scalextric Mercedes 190SL models on later Scalextric Classic track and even new Scalextric Sort track layouts.
The original guide pin is sometimes referred to as G5.
Another great solution from Scalextric Car Restorations

Light bulbs for vintage Scalextric cars E1, E2, E3, E4 and E5

Replacement light bulbs for head lights and tail lights for vintage Scalextric cars.
Scalextric bulbs
These vintage Scalextric light bulbs are NEW and are replacements for those fitted to the cars listed below. The bulbs are 10mm (approx. 7/16″) long with a 5mm (approx. 7/32″) diameter and the two leads are 21mm (approx. 13/16″) long. The grommets have an internal hole diameter of 5mm (approx. 7/32″), fit a panel thickness of 1.7mm (approx. 1/16″) and a panel fixing hole diameter of 7.2mm (approx. 9/32″).
This vintage Scalextric light bulb kit can be fitted to the C56, C57, C68 and C69 cars that came without lights.
The set contains:
  • 3 bulbs
  • 3 fixing grommets
The bulbs are available in standard and high brightness versions.
Please note that there are 3 bulbs in each car, one for each headlight and one for both rear lights.
Service sheets are available that show how these bulbs are fitted and connected
More great spares from Scalextric Car Restorations

Scalextric slot car parts Neodymium magnatraction magnet kit

Transform your slot car’s performance with these upgraded Neodymium magnatraction magnets.  Improved track performance with minimal effort.
Scalextric magnets
These Scalextric spares Neodymium Iron Boron magnets have a gauss level which is typically 2 – 4 times higher than standard Alnico magnets. They are nickel-plated for improved corrosion resistance and appearance.
They are suitable for all slot cars; Artin, Ninco, SCX, Scalextric, SCX Scalextric, Tri-ang and many more.
This kit is great if you are not sure which Scalextric spares magnets would be best suited for your car. This kit contains:
Quantity
Description
2
Bar magnet 12mm x 6mm x 1.5mm (1/2″ x 1/4″ x 1/16″ approx.)
2
Bar magnet 25mm x 6mm x 1.5mm (1″ x 1/4″ x 1/16″ approx.)
1
Bar magnet 25mm x 6mm x 3mm (1/2″ x 1/4″ x 1/8″ approx.)
2
Button magnet 8mm x 3mm (1/4″ x 1/8″ approx.)
2
Button magnet 8mm x 5mm (1/4″ x 3/16″ approx.)
1
Button magnet 10mm x 5mm (3/8″ x 3/16″ approx.)

Please see our Neodymium Magnet Safety Page for further information.
Our unique Magnet Downforce Calculator gives the magnetic attraction force for this magnet at given distances from the track. Ideal for locating the magnet.
A great selection from Scalextric Car Restorations

Saturday, 30 January 2016

Complete 24 piece slot car chassis kit

Complete plastic moulded adjustable 24 piece slot car chassis kit with Neodymium magnet.
Slot car chassis kit
This complete plastic moulded slot car chassis kit is ideal for many of the 1:32 scale resin and plastic slot car body kits available. This chassis kit comes complete with:
  • Rear chassis piece
  • Front chassis piece
  • 2 off stainless steel screws
  • 2 off stainless steel plain washers
  • 2 off stainless steel Nyloc nuts
  • 2 off front axle spacers
  • 2 off 60mm stainless steel axles
  • Contrate gear in black
  • Mabuchi S can motor with wires and guide assembly
  • Motor pinion gear – 9z in white
  • 4 off wheels (optional)
  • 4 off MAX Grip tyres (optional)
  • Neodymium magnet (optional)
Dimensions:
  • Overall width 33mm
  • Height (without motor, axle and guide) 12mm
  • Overall length (minimum) 92mm
  • Overall length (maximum) 112mm
  • Minimum wheelbase 64mm
  • Maximum wheelbase 84mm
  • Small tyre – 17.0 mm outside diameter
  • Medium tyre – 20.0 mm outside diameter
  • Large tyre – 22.5 mm outside diameter
The slot car body is secured to this slot car chassis with 2 fixing points at the rear behind the rear axle and by 1 fixing point behind the front axle. This is the standard form factor for the resin and plastic body kits readily available.
Another great item from Scalextric Car Restorations

How to make a slot car chassis

Make your own slot car chassis with this simple design process

Abstract

There are many slot car body kits available today providing the slot car enthusiast with many options to make their own functioning slot car (Scalextric car). Some of the body kits are finely modeled while some are more basic but all of them need a chassis in order to be completed and run on the slot car track. This article explains the making of just such a chassis.
Slot car chassis kit

Introduction

There are a myriad of small and large scale suppliers of 1:32 scale slot car body kits out there all making resin based slot car kits, most include the windows and the interior. The very best include all the trim parts in metal too, laser cut this and metal cast that. So, the whole range is out there somewhere. The problem has always been about the modeling skills to assemble these kits and then to track down a 1:32 scale slot car chassis, wheels and tyres so you can race your wonderful model. So here you are, all the information needed to make your own slot car chassis.

Making the basic form

The important aspects of a slot car chassis are:
  • Mounting of the rear axle
  • Mounting of the front axle
  • Mounting of the motor
  • Mounting of the guide blade
  • Fitting to the slot car body
  • Mounting of a Neodymium magnet for Magnatraction (if needed)
So, not too much to take into account then… It must be remembered that the gears have to be accurately aligned and the axles have to provide the right ride height for the selected wheels, tyres and slot car model. To produce our chassis we selected 2mm plasticard as a starting point. This will give good thick and strong sections, is workable and can be joined easily with superglue.
We also decided to use all Scalextric parts and standards. That’s the following parts and standards:
  • Axle diameter
  • Motor (Mabuchi S can with brush end drive)
  • Motor pinion gear
  • Rear axle contrate gear
  • Guide blade, pins and wires
  • Wheels
  • Tyres
This was done simply to minimise design effort and to allow the slot car modeler to use parts that are in plentiful supply. Therefore, someone with an existing Scalextric car could use all the parts they had to make the chassis functional. The next problem to overcome was the risk of the rear axle coming lose from the chassis.
This chassis is to use plain holes for both the front and rear axles to give the chassis good strength. Scalextric and other slot cars use an open clip arrangement for the rear axle bearings which can “unclip” in use. Scalextric get round this by adding extensions to the interior of the car which hold the rear axle bearings into place.
With resin slot car kits these extensions are not present so the standard Scalextric solution is not robust. As a result we took the solution to use plain holes which cannot fail in this way. This was especially important as we were adding a Neodymium magnet for magnatraction to our slot car chassis.
Slot car chassis kit
The image above shows the basic form of the chassis taking place. We started with the motor mounting and the related rear axle position. Here you can see the start of the motor mounts the rear axle bearings and the cut out for the contrate gear as well as the chassis side supports.
Slot car chassis kit
At his point we’ve added a little more detailing to the rear of the slot car chassis and the motor fixing solution. We’ve added the basics of the front end too. The guide blade mounting is in position as are the front axle bearings. In this image you can also see the motor in position and the body mounting solution is in place and being tuned.
Slot car chassis kit
This image shows the chassis with the first trail of the selected wheels and tyres. In the first instance there will be two wheel options, one road type and one Minilight type (the road wheel is on the rear and the Minilight wheel is on the front). The wheels have the same form factor and so can use the same range of Max Grip tyres. The picture above shows the largest and smallest tyres suitable for these wheels.
Slot car chassis kit
This picture shows the chassis fully assembled and a little more refined. The guide mount has been tidied up as has the side sections. You can clearly see the motor is mounted at a slight downward angle too. This allows the rear axle to be mounted lower which, in turn, allows smaller diameter wheels and tyres to be used. The original concept was to allow the Scalextric small Superslix wheels and tyres to be used if desired.
Slot car chassis kit
Above you can see the underside of the fully assembled chassis. This image shows the motor and rear axle arrangement as well as the guide and body fixing solution. This chassis will be secured to the slot car body by means of 3 self taping screws, 2 at the rear and one at the front. As this chassis is intended to run close to the track surface the screw heads are sunk into the chassis surface.

Making the chassis adjustable

At this stage we have the basic form of the slot car chassis with a fixed wheelbase of 75mm. This is of little use unless your slot car body has the same wheelbase. So, there’s only one solution, make the slot car chassis wheelbase adjustable.
Slot car chassis kit
And now the scary bit. Clearly, all cars as well as their slot car clones have different wheelbases. That’s the distance between the front and rear wheels. So, any universal slot car chassis must be adjustable for wheelbase. This means cutting the chassis into two pieces and providing a means to allow the wheelbase to be adjusted and set. This image shows the front and rear chassis pieces as well as the start of the sliding mechanism.
Slot car chassis kit
In order to manufacture this slot car chassis in volume we needed to provide it with a consistent surface finish. Some parts were glossy plasticard surface, some parts were superglue finish and much was a sanded or filed finish. Also, there were minor surface imperfections due to the amount of machining carried out to make these master parts. To remove the minor surface imperfections we spray painted the slot car chassis in primer and sanded it back. We repeated this process until the surface imperfection were cleared away. Here you can see the two master chassis pieces prepared and ready to the make the mould as well as the master wheel models and the selected fixing screws, washers and Nyloc nuts.

Into production

Making one chassis is good but the plan is to make lot’s of chassis kits for the slot car makers out there. Therefore, the master two slot car chassis pieces have to be copied many times over. We use a low volume moulding method make copies of the original parts to go into the slot car chassis kits.
Slot car chassis kit
Above is the complete slot car chassis kit. This plastic moulded slot car chassis kit is ideal for many of the 1:32 scale resin and plastic slot car body kits available. The kit comes complete with:
  • Rear chassis piece
  • Front chassis piece
  • 2 off stainless steel screws
  • 2 off stainless steel plain washers
  • 2 of stainless steel Nyloc nuts
  • 2 off front axle spacers
  • Neodymium magnet (optional)
Dimensions:
  • Overall width 33mm
  • Height (without motor, axle and guide) 12mm
  • Overall length (minimum) 92mm
  • Overall length (maximum) 112mm
  • Minimum wheelbase 64mm
  • Maximum wheelbase 84mm
  • Recommended minimum tyre outside diameter 16mm (small superslix tyres)
This chassis is designed to use the following standard Scalextric parts:
  • Mabuchi S can motor
  • Rear axle (black or yellow contrate gear) 3/32″ diameter
  • 9z motor pinion gear
  • Front axle 3/32″ diameter
  • Guide blade, pins and wires
  • Wheels
  • Tyres
The slot car body is secured to this slot car chassis with 2 fixing points at the rear behind the rear axle and by 1 fixing point behind the front axle. This is the standard form factor for the resin and plastic body kits readily available.

About the author:

Gary Harding has been working with Scalextric cars for over 35 years and now operates Scalextric Car Restorations in the UK. Scalextric Car Restorations is a Worldwide internet based business that offers for sale high quality Scalextric cars and Scalextric parts from the 1960s to the present day. All the restoration work is carried out to the highest standards with the highest quality parts available. Only the best cars are selected and the final result is a car that is genuinely like new.
Further help and advice relating to this article or Scalextric cars in general can be found at:
http://www.scalextric-car.co.uk